Introduction
Imagine spinning up an entire private blockchain network with four nodes, complete consensus, and production-ready configuration—all with a some Docker command. That's the power of containerizing Hyperledger Besu with Docker.
In this guide, you’ll build a fully functional private blockchain network using Docker and Hyperledger Besu. We’ll configure QBFT for robust Byzantine fault tolerance, use Docker to streamline deployment, and integrate tools like Hardhat, web3.js, and Remix for smart contract development. By the end, you’ll have a scalable, containerized blockchain ready to run anywhere — from local environments to production-grade Kubernetes clusters.
What you'll learn:
- Setting up Hyperledger Besu nodes using Docker and Docker Compose
- Automatically generating QBFT network configuration with Besu's built-in tools
- Managing multi-node networks with docker-compose orchestration
- Understanding Besu's default ports and RPC configurations
- Deploying and interacting with Solidity smart contracts using local Hardhat
- Alternative deployment methods using web3.js and Remix
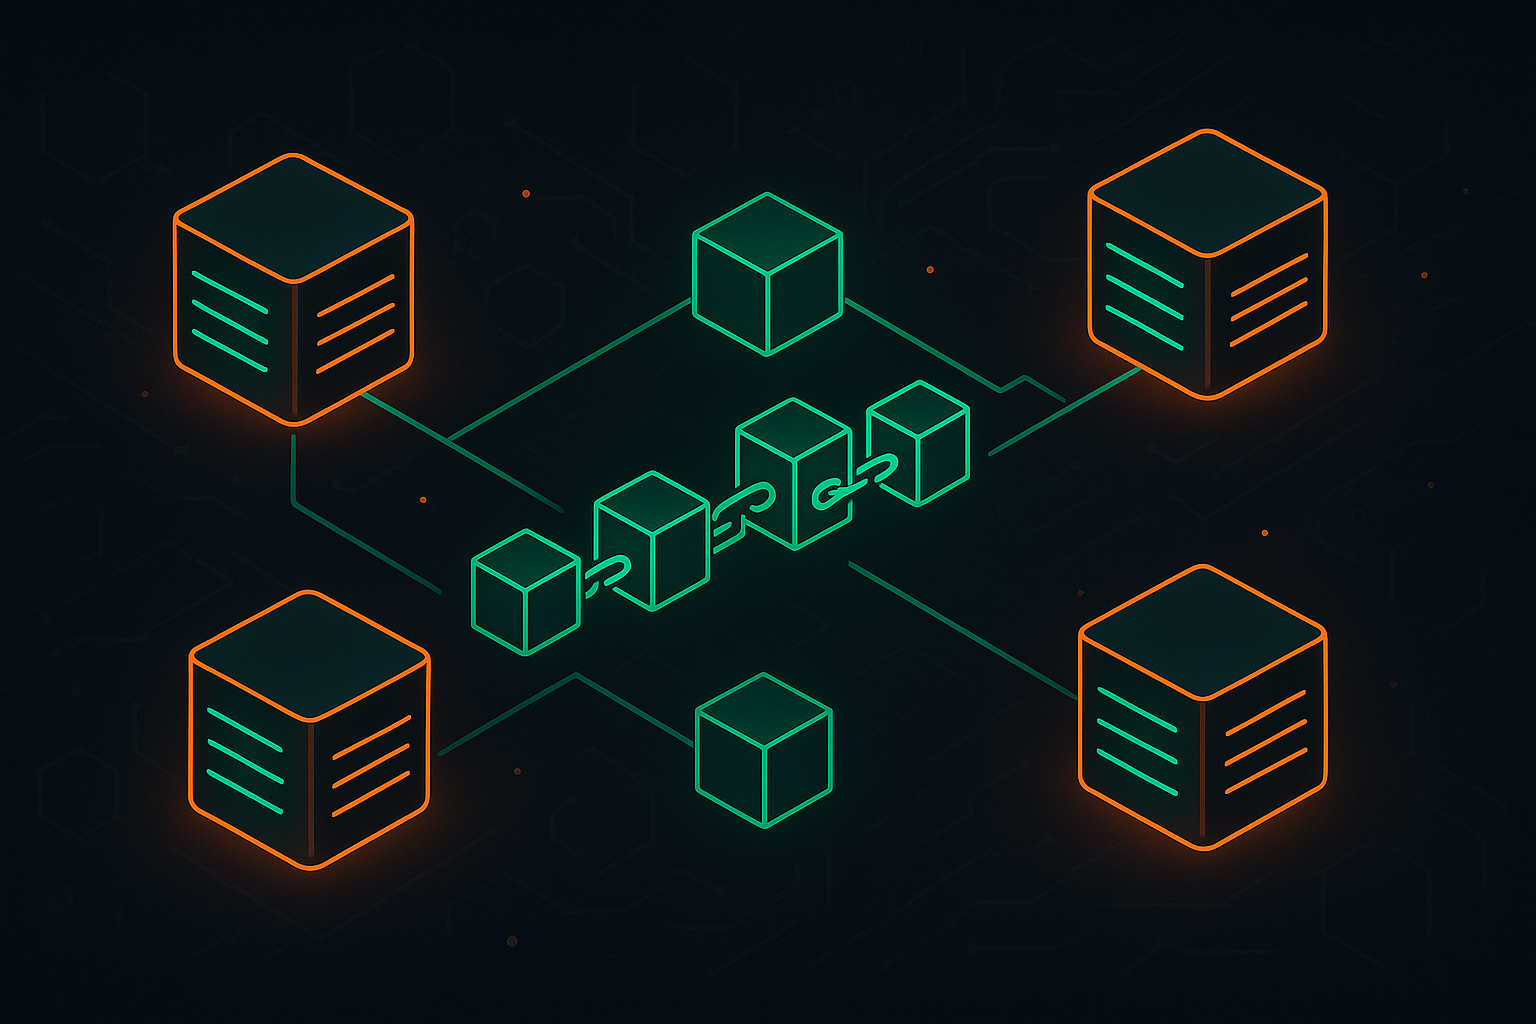
The Architecture: Understanding the Containerized System
Before diving into implementation, let's visualize the Docker-based architecture:
┌───────────────────────────────────────────────────────────┐
│               Docker Network (besu-network)               │
│               Bridge Network: 172.25.0.0/16               │
│                                                           │
│    ┌─────────────┐  ┌──────────────┐  ┌──────────────┐    │
│    │    Node-1   │  │    Node-2    │  │    Node-3    │    │
│    │ (Validator) │  │  (Validator) │  │  (Validator) │    │
│    │  HTTP:8545  │  │   HTTP:8546  │  │   HTTP:8547  │    │
│    └──────┬──────┘  └───────┬──────┘  └────────┬─────┘    │
│           │                 │                  │          │
│           └─────────────────┼──────────────────┘          │
│                             │                             │
│                     ┌───────▼────────┐                    │
│                     │     Node-4     │                    │
│                     │   (RPC Node)   │                    │
│                     │    HTTP:8548   │                    │
│                     └────────────────┘                    │
│                             │                             │
└─────────────────────────────┼─────────────────────────────┘
                              │
                     ┌────────▼────────┐
                     │  Local Hardhat  │
                     │  (Dev Machine)  │
                     │   Port: 8548    │
                     └─────────────────┘
Key Components:
- Besu Validator Nodes (1-3): Byzantine fault-tolerant consensus participants that propose and finalize blocks
- Besu RPC Node (4): Dedicated endpoint for smart contract interactions (non-validator)
- Docker Network: Isolated virtual network for secure inter-node communication
- Volume Mounts: Persistent storage for blockchain data and configurations
- Local Hardhat: Development environment running on your machine for smart contract deployment
Part 1: Project Structure and Network Generation
Step 1: Create Project Directory Structure
Create the complete directory structure for your containerized blockchain:
# Create project root
mkdir besu-docker-network
cd besu-docker-network

# Create necessary directories
mkdir -p config
mkdir -p nodes
mkdir -p smart-contracts
mkdir -p scripts

# Your structure should look like:
# besu-docker-network/
# ├── docker-compose.yml
# ├── .env
# ├── config/
# │   └── qbftConfigFile.json
# ├── nodes/
# │   └── networkFiles/  (will be generated)
# ├── smart-contracts/
# │   ├── hardhat.config.js
# │   ├── package.json
# │   └── contracts/
# └── scripts/
#     └── generate-network.sh
Step 2: Pull Besu Docker Image
First, pull the official Hyperledger Besu image:
# Pull the latest Besu image
docker pull hyperledger/besu:latest

# Verify the image
docker images | grep besu

# Expected output:
# hyperledger/besu   latest   abc123def456   2 days ago   850MB
Step 3: Create QBFT Network Configuration File
Create config/qbftConfigFile.json to define your network topology:
{
  "genesis": {
    "config": {
      "chainId": 1337,
      "berlinBlock": 0,
      "londonBlock": 0,
      "qbft": {
        "epochlength": 30000,
        "blockperiodseconds": 2,
        "requesttimeoutseconds": 4
      }
    },
    "nonce": "0x0",
    "timestamp": "0x58ee40ba",
    "gasLimit": "0x1C9C380",
    "difficulty": "0x1",
    "mixHash": "0x63746963616c2062797a616e74696e65206661756c7420746f6c6572616e6365",
    "coinbase": "0x0000000000000000000000000000000000000000",
    "alloc": {
      "fe3b557e8fb62b89f4916b721be55ceb828dbd73": {
        "balance": "0x200000000000000000000000000000000000000000000000000000000000000"
      }
    }
  },
  "blockchain": {
    "nodes": {
      "generate": true,
      "count": 4
    }
  }
}
Configuration Parameters Explained:
- chainId: Unique identifier for your private network (1337 is commonly used for local dev)
- blockperiodseconds: Time between blocks (2 seconds = high throughput)
- requesttimeoutseconds: Timeout for consensus messages
- epochlength: Blocks before validator set can be modified
- gasLimit: Maximum gas per block (0x1C9C380 = 30,000,000)
- count: Number of nodes to generate (4 nodes = 3 validators + 1 RPC node)
- alloc: Pre-funded accounts for testing (90M ETH in this example)
You can replace the sample address inside the alloc section with your own wallet’s public address to pre-fund your account when the network is initialized.
Step 4: Generate Network Configuration Automatically
💡 Quick Start Tip: Steps 4 and 5 explain the network generation process in detail so you understand what's happening under the hood. If you prefer to skip the technical explanation and jump straight to automation, go directly to Step 6 where we've created a convenient script that handles everything automatically.
Now comes the magic! Use Besu's built-in network generator to create all node keys, addresses, and genesis file automatically:
# Generate complete network configuration
docker run --rm \
  -v $(pwd)/config:/config \
  -v $(pwd)/nodes:/nodes \
  hyperledger/besu:latest \
  operator generate-blockchain-config \
  --config-file=/config/qbftConfigFile.json \
  --to=/nodes/networkFiles \
  --private-key-file-name=key
What just happened?
This single command:
- Generated 4 node private keys and public keys
- Extracted Ethereum addresses for each node
- Created a complete genesis.json with proper extraData (containing validator addresses)
Verify the generated files:
# Check the generated structure
tree nodes/networkFiles

# Expected output:
# nodes/networkFiles
# ├── genesis.json
# └── keys/
#     ├── 0x1234...5678
#     │   ├── key
#     │   └── key.pub
#     ├── 0x2345...6789
#     │   ├── key
#     │   └── key.pub
#     ├── 0x3456...7890
#     │   ├── key
#     │   └── key.pub
#     └── 0x4567...8901
#         ├── key
#         └── key.pub
# 6 directories, 9 files
View generated genesis file:
# Pretty print the genesis file
cat nodes/networkFiles/genesis.json | jq '.'

# Check validator addresses in extraData
cat nodes/networkFiles/genesis.json | jq -r '.extraData'
Pro Tip: The generate-blockchain-config command is a game-changer! It eliminates manual key generation, address extraction, and genesis file configuration—reducing setup time from hours to seconds.
Step 5: Organize Node Directories
Now that we've generated the network configuration, we need to organize the keys into individual node directories. Note: This step is also automated in Step 6's script, but understanding the manual process helps you troubleshoot if needed.
Create individual data directories for each node:
# Create data directories for all nodes
for i in {1..4}; do
  mkdir -p nodes/node-$i/data
done

# Copy node keys to respective directories
# Get list of generated addresses
ADDRESSES=($(ls nodes/networkFiles/keys/))

# Copy keys to node directories
for i in {1..4}; do
  NODE_INDEX=$((i))
  NODE_ADDRESS=${ADDRESSES[$NODE_INDEX]}

  echo "Setting up Node-$i with address: $NODE_ADDRESS"

  # Copy keys
  cp nodes/networkFiles/keys/$NODE_ADDRESS/key nodes/node-$i/data/
  cp nodes/networkFiles/keys/$NODE_ADDRESS/key.pub nodes/node-$i/data/

  # Save address for reference
  echo $NODE_ADDRESS > nodes/node-$i/data/address
done

echo "Node directories configured successfully!"
Security best practices:
- The
nodesdirectory contains sensitive security data — including private keys, network configuration files, and other confidential node information. - Do not expose, commit, or share any files from this directory publicly (for example, on GitHub or cloud storage).
Step 6: Automated Network Generation Script (Recommended)
If you followed Steps 4 and 5 manually, great—you now understand the process! For everyone else (and for future regenerations), use this automated script that combines both steps into a single command.
This script handles:
- Cleaning previous network files
- Generating network configuration with Besu
- Creating node directories
- Distributing keys to each node
- Securing private key permissions
Create scripts/generate-network.sh:
#!/bin/bash

echo "🔧 Generating Besu QBFT Network Configuration..."
echo "================================================"

# Colors
GREEN='\033[0;32m'
YELLOW='\033[1;33m'
RED='\033[0;31m'
NC='\033[0m'

# Check if config file exists
if [ ! -f "config/qbftConfigFile.json" ]; then
    echo -e "${RED}❌ Error: config/qbftConfigFile.json not found!${NC}"
    exit 1
fi

# Clean previous network files
echo -e "${YELLOW}🧹 Cleaning previous network files...${NC}"
rm -rf nodes/networkFiles
rm -rf nodes/node-*/data

# Generate network configuration
echo -e "${YELLOW}⚙️  Generating network configuration...${NC}"
docker run --rm \
  -v $(pwd)/config:/config \
  -v $(pwd)/nodes:/nodes \
  hyperledger/besu:latest \
  operator generate-blockchain-config \
  --config-file=/config/qbftConfigFile.json \
  --to=/nodes/networkFiles \
  --private-key-file-name=key

# Check if generation was successful
if [ ! -f "nodes/networkFiles/genesis.json" ]; then
    echo -e "${RED}❌ Network generation failed!${NC}"
    exit 1
fi

echo -e "${GREEN}✅ Network configuration generated successfully!${NC}"

# Create node data directories
echo -e "${YELLOW}📁 Creating node directories...${NC}"
for i in {1..4}; do
  mkdir -p nodes/node-$i/data
done

# Copy keys to node directories
echo -e "${YELLOW}🔑 Distributing node keys...${NC}"
ADDRESSES=($(ls nodes/networkFiles/keys/))

for i in {1..4}; do
  NODE_INDEX=$((i-1))
  NODE_ADDRESS=${ADDRESSES[$NODE_INDEX]}

  echo -e "  ${GREEN}✓${NC} Node-$i: $NODE_ADDRESS"

  cp nodes/networkFiles/keys/$NODE_ADDRESS/key nodes/node-$i/data/
  cp nodes/networkFiles/keys/$NODE_ADDRESS/key.pub nodes/node-$i/data/
  echo $NODE_ADDRESS > nodes/node-$i/data/address
done

# Secure key files
echo -e "${YELLOW}🔒 Securing private keys...${NC}"
chmod 600 nodes/node-*/data/key
chmod 700 nodes/node-*/data

echo ""
echo -e "${GREEN}✨ Network setup complete!${NC}"
echo ""
echo "📋 Generated Files:"
echo "  - Genesis file: nodes/networkFiles/genesis.json"
echo "  - Node keys: nodes/node-{1..4}/data/key"
echo ""
echo "Next steps:"
echo "  Review the genesis file: cat nodes/networkFiles/genesis.json | jq"
echo ""
Make it executable and run:
chmod +x scripts/generate-network.sh
./scripts/generate-network.sh
Expected output:
🔧 Generating Besu QBFT Network Configuration...
================================================
🧹 Cleaning previous network files...
⚙️ Generating network configuration...
   Network configuration generated successfully!
📁 Creating node directories...
🔑 Distributing node keys...
  ✓ Node-1: 0x324582da6b84869df933e8b32f1b0d29250fce3b
  ✓ Node-2: 0x407ad940ce5abee3eb1dc85e4184b8cd2b4b16b3
  ✓ Node-3: 0x8d993e4e1ffcf2321a57e87f4133a9bb55766916
  ✓ Node-4: 0xa3ff928703b195257c2ccb844df6723754a63f8c
🔒 Securing private keys...

✨ Network setup complete!

📋 Generated Files:
  - Genesis file: nodes/networkFiles/genesis.json
  - Node keys: nodes/node-{1..4}/data/key

Next steps:
  Review the genesis file: cat nodes/networkFiles/genesis.json | jq
Part 2: Docker Compose Configuration
Step 1: Create Environment Configuration
Create .env file for easy configuration management:
# Network Configuration
NETWORK_ID=1337

# Besu Version
BESU_IMAGE=hyperledger/besu:latest

# Gas Configuration
MIN_GAS_PRICE=0
Step 2: Create Docker Compose Configuration
Create docker-compose.yml with optimized QBFT configuration:
services:
  node-1:
    image: ${BESU_IMAGE}
    container_name: besu-node-1
    hostname: node-1
    networks:
      besu-network:
        ipv4_address: 172.25.0.2
    ports:
      - '8545:8545' # HTTP JSON-RPC
      - '30303:30303' # P2P
    volumes:
      - ./nodes:/nodes
    command:
      # Data and Network
      - --data-path=/nodes/node-1/data
      - --genesis-file=/nodes/networkFiles/genesis.json
      - --network-id=${NETWORK_ID}

      # HTTP JSON-RPC
      - --rpc-http-enabled
      - --rpc-http-host=0.0.0.0
      - --rpc-http-port=8545
      - --rpc-http-api=ETH,NET,QBFT,WEB3,ADMIN,DEBUG,TXPOOL
      - --rpc-http-max-active-connections=80
      - --rpc-http-cors-origins=*
      - --host-allowlist=*

      # P2P Networking
      - --p2p-enabled=true
      - --p2p-host=0.0.0.0
      - --p2p-port=30303

      # WS-RPC
      - --rpc-ws-enabled=true
      - --rpc-ws-host=0.0.0.0
      - --rpc-ws-port=8546
      - --rpc-ws-api=ETH,NET,QBFT,WEB3,ADMIN,DEBUG,TRACE,TXPOOL
      - --rpc-ws-max-active-connections=80
      - --data-storage-format=BONSAI
      - --bootnodes=enode://$(cat /nodes/node-1/data/key.pub | sed 's/^0x//')@172.25.0.2:30303,enode://$(cat /nodes/node-2/data/key.pub | sed 's/^0x//')@172.25.0.3:30303,enode://$(cat /nodes/node-3/data/key.pub | sed 's/^0x//')@172.25.0.4:30303,enode://$(cat /nodes/node-4/data/key.pub | sed 's/^0x//')@172.25.0.5:30303
      - --min-gas-price=${MIN_GAS_PRICE}
    restart: unless-stopped

  node-2:
    image: ${BESU_IMAGE}
    container_name: besu-node-2
    hostname: node-2
    networks:
      besu-network:
        ipv4_address: 172.25.0.3
    ports:
      - '8546:8545' # HTTP JSON-RPC
      - '30304:30303' # P2P
    volumes:
      - ./nodes:/nodes
    depends_on:
      - node-1
    command:
      # Data and Network
      - --data-path=/nodes/node-2/data
      - --genesis-file=/nodes/networkFiles/genesis.json
      - --network-id=${NETWORK_ID}

      # HTTP JSON-RPC
      - --rpc-http-enabled
      - --rpc-http-host=0.0.0.0
      - --rpc-http-port=8545
      - --rpc-http-api=ETH,NET,QBFT,WEB3,ADMIN
      - --rpc-http-cors-origins=*
      - --rpc-http-max-active-connections=80
      - --host-allowlist=*

      # P2P Networking
      - --p2p-enabled=true
      - --p2p-host=0.0.0.0
      - --p2p-port=30303

      # WS-RPC
      - --rpc-ws-enabled=true
      - --rpc-ws-host=0.0.0.0
      - --rpc-ws-port=8546
      - --rpc-ws-api=ETH,NET,QBFT,WEB3,ADMIN,DEBUG,TRACE,TXPOOL
      - --rpc-ws-max-active-connections=80
      - --data-storage-format=BONSAI
      - --bootnodes=enode://$(cat /nodes/node-1/data/key.pub | sed 's/^0x//')@172.25.0.2:30303,enode://$(cat /nodes/node-2/data/key.pub | sed 's/^0x//')@172.25.0.3:30303,enode://$(cat /nodes/node-3/data/key.pub | sed 's/^0x//')@172.25.0.4:30303,enode://$(cat /nodes/node-4/data/key.pub | sed 's/^0x//')@172.25.0.5:30303
      - --min-gas-price=${MIN_GAS_PRICE}
    restart: unless-stopped

  node-3:
    image: ${BESU_IMAGE}
    container_name: besu-node-3
    hostname: node-3
    networks:
      besu-network:
        ipv4_address: 172.25.0.4
    ports:
      - '8547:8545' # HTTP JSON-RPC
      - '30305:30303' # P2P
    volumes:
      - ./nodes:/nodes
    depends_on:
      - node-1
    command:
      # Data and Network
      - --data-path=/nodes/node-3/data
      - --genesis-file=/nodes/networkFiles/genesis.json
      - --network-id=${NETWORK_ID}

      # HTTP JSON-RPC
      - --rpc-http-enabled
      - --rpc-http-host=0.0.0.0
      - --rpc-http-port=8545
      - --rpc-http-api=ETH,NET,QBFT,WEB3,ADMIN
      - --rpc-http-max-active-connections=80
      - --rpc-http-cors-origins=*
      - --host-allowlist=*

      # P2P Networking
      - --p2p-enabled=true
      - --p2p-host=0.0.0.0
      - --p2p-port=30303

      # WS-RPC
      - --rpc-ws-enabled=true
      - --rpc-ws-host=0.0.0.0
      - --rpc-ws-port=8546
      - --rpc-ws-api=ETH,NET,QBFT,WEB3,ADMIN,DEBUG,TRACE,TXPOOL
      - --rpc-ws-max-active-connections=80
      - --data-storage-format=BONSAI
      - --bootnodes=enode://$(cat /nodes/node-1/data/key.pub | sed 's/^0x//')@172.25.0.2:30303,enode://$(cat /nodes/node-2/data/key.pub | sed 's/^0x//')@172.25.0.3:30303,enode://$(cat /nodes/node-3/data/key.pub | sed 's/^0x//')@172.25.0.4:30303,enode://$(cat /nodes/node-4/data/key.pub | sed 's/^0x//')@172.25.0.5:30303
      - --min-gas-price=${MIN_GAS_PRICE}
    restart: unless-stopped

  node-4:
    image: ${BESU_IMAGE}
    container_name: besu-node-4
    hostname: node-4
    networks:
      besu-network:
        ipv4_address: 172.25.0.5
    ports:
      - '8548:8545' # HTTP JSON-RPC
      - '30306:30303' # P2P
    volumes:
      - ./nodes:/nodes
    depends_on:
      - node-1
    command:
      # Data and Network
      - --data-path=/nodes/node-4/data
      - --genesis-file=/nodes/networkFiles/genesis.json
      - --network-id=${NETWORK_ID}

      # HTTP JSON-RPC (RPC Node - no ADMIN/QBFT APIs for security)
      - --rpc-http-enabled
      - --rpc-http-host=0.0.0.0
      - --rpc-http-port=8545
      - --rpc-http-api=ETH,NET,WEB3,DEBUG,TRACE,TXPOOL
      - --rpc-http-max-active-connections=80
      - --rpc-http-cors-origins=*
      - --host-allowlist=*

      # P2P Networking
      - --p2p-enabled=true
      - --p2p-host=0.0.0.0
      - --p2p-port=30303
      - --rpc-ws-enabled=true
      - --rpc-ws-host=0.0.0.0
      - --rpc-ws-port=8546
      - --rpc-ws-api=ETH,NET,WEB3,DEBUG,TRACE,TXPOOL
      - --rpc-ws-max-active-connections=80
      - --data-storage-format=BONSAI
      - --bootnodes=enode://$(cat /nodes/node-1/data/key.pub | sed 's/^0x//')@172.25.0.2:30303,enode://$(cat /nodes/node-2/data/key.pub | sed 's/^0x//')@172.25.0.3:30303,enode://$(cat /nodes/node-3/data/key.pub | sed 's/^0x//')@172.25.0.4:30303,enode://$(cat /nodes/node-4/data/key.pub | sed 's/^0x//')@172.25.0.5:30303
      - --min-gas-price=${MIN_GAS_PRICE}
    restart: unless-stopped

networks:
  besu-network:
    driver: bridge
    ipam:
      config:
        - subnet: 172.25.0.0/16
Key Docker Compose Features:
- Official Image:
hyperledger/besu:latest - Volume Mounts: Each node's data directory is mounted for persistent storage
- Shared Genesis: All nodes share the same genesis file
- Network Isolation: All nodes communicate via
besu-networkbridge
Understanding Port Mappings:
-
Default Besu Ports (inside containers):
8545: HTTP JSON-RPC (standard default)8546: WebSocket JSON-RPC (standard default)8551: Engine API (not used in this setup)30303: P2P networking
-
Host Port Mappings (exposed to your machine):
- Node-1:
localhost:8545→ container HTTP 8545 - Node-2:
localhost:8546→ container HTTP 8545 - Node-3:
localhost:8547→ container HTTP 8545 - Node-4:
localhost:8548→ container HTTP 8545
- Node-1:
Why different host ports? Each container uses the standard port 8545 internally, but we map them to different host ports (8545, 8546, 8547, 8548) to avoid conflicts. This allows you to access all nodes simultaneously from your machine.
Important: The $(cat nodes/node-1/data/key.pub | tr -d '\n') command reads the bootnode's public key directly from the mounted volume. This eliminates manual enode URL configuration!
Security Note: The --rpc-http-cors-origins=* and --host-allowlist=* settings are permissive and suitable for local development. For production deployments:
- Restrict CORS to specific origins
- Limit host allowlist to known hosts
- Consider adding authentication
- Never expose ADMIN APIs publicly
Part 3: Starting and Managing the Blockchain Network
Step 1: Start the Network
Launch all containers:
# Start all nodes in detached mode
docker compose up -d

# Watch the logs in real-time
docker compose logs -f
Expected startup sequence:
[+] Running 5/5
 ✔ Network besu-docker-network_besu-network      Created          0.1s
 ✔ Container besu-node-1                         Started          2.3s
 ✔ Container besu-node-2                         Started          2.1s
 ✔ Container besu-node-3                         Started          2.2s
 ✔ Container besu-node-4                         Started          2.3s
Success indicators in logs:
besu-node-1  | INFO  | EthProtocolManager | P2PNetwork | enode://abc123...@node-1:30303
besu-node-1  | INFO  | JsonRpcHttpService | HTTP JSON-RPC service started
besu-node-1  | INFO  | QbftBesuControllerBuilder | Starting QBFT BlockchainMiner
besu-node-2  | INFO  | PeerDiscoveryAgent | Discovered 1 peers
besu-node-1  | INFO  | QbftRound | Imported #1 / 0 tx / 0 pending
besu-node-2  | INFO  | QbftRound | Imported #1 / 0 tx / 0 pending
besu-node-3  | INFO  | QbftRound | Imported #1 / 0 tx / 0 pending
Step 2: Verify Network Status
Check that all containers are running:
# Check container status
docker compose ps

# Expected output showing all containers running
NAME            IMAGE                        STATUS
besu-node-1     hyperledger/besu:latest      Up 2 minutes
besu-node-2     hyperledger/besu:latest      Up 2 minutes
besu-node-3     hyperledger/besu:latest      Up 2 minutes
besu-node-4     hyperledger/besu:latest      Up 2 minutes
Verify peer connections:
# Check peers on node-1
curl -X POST --data '{
  "jsonrpc":"2.0",
  "method":"admin_peers",
  "params":[],
  "id":1
}' http://localhost:8545 | jq '.result | length'

# Expected: 3 (nodes 2, 3, and 4 connected to node-1)
Check block production:
# Get current block number
curl -X POST --data '{
  "jsonrpc":"2.0",
  "method":"eth_blockNumber",
  "params":[],
  "id":1
}' http://localhost:8545 | jq -r '.result' | xargs printf "%d\n"

# Wait 10 seconds and check again - should increase by ~5 blocks
sleep 10
curl -X POST --data '{
  "jsonrpc":"2.0",
  "method":"eth_blockNumber",
  "params":[],
  "id":1
}' http://localhost:8545 | jq -r '.result' | xargs printf "%d\n"
Step 3: Create Monitoring Script
Create scripts/network-status.sh for quick health checks:
#!/bin/bash

# Colors
GREEN='\033[0;32m'
YELLOW='\033[1;33m'
RED='\033[0;31m'
NC='\033[0m'

echo "🔍 Besu Network Status"
echo "======================"
echo ""

# Function to check node
check_node() {
    local name=$1
    local port=$2

    response=$(curl -s -X POST --data '{"jsonrpc":"2.0","method":"eth_blockNumber","params":[],"id":1}' \
        http://localhost:$port 2>/dev/null)

    if [ $? -eq 0 ]; then
        block=$(echo $response | jq -r '.result' | xargs printf "%d" 2>/dev/null)
        echo -e "${GREEN}✓${NC} $name (Port $port) - Block: $block"
    else
        echo -e "${RED}✗${NC} $name (Port $port) - Unreachable"
    fi
}

# Check all nodes
echo "📦 Nodes Status:"
check_node "Node-1 (Validator)" 8545
check_node "Node-2 (Validator)" 8546
check_node "Node-3 (Validator)" 8547
check_node "Node-4 (RPC Node)" 8548

echo ""
echo "🔗 Network Info:"
peers=$(curl -s -X POST --data '{"jsonrpc":"2.0","method":"admin_peers","params":[],"id":1}' \
    http://localhost:8545 | jq -r '.result | length')
echo "  Connected Peers: $peers"

# Check if blocks are being produced
block1=$(curl -s -X POST --data '{"jsonrpc":"2.0","method":"eth_blockNumber","params":[],"id":1}' \
    http://localhost:8545 | jq -r '.result' | xargs printf "%d")
sleep 5
block2=$(curl -s -X POST --data '{"jsonrpc":"2.0","method":"eth_blockNumber","params":[],"id":1}' \
    http://localhost:8545 | jq -r '.result' | xargs printf "%d")

if [ $block2 -gt $block1 ]; then
    echo -e "  Block Production: ${GREEN}Active${NC} (+$((block2-block1)) blocks in 5s)"
else
    echo -e "  Block Production: ${RED}Stopped${NC}"
fi

echo ""
echo "🐳 Docker Containers:"
docker compose ps --format "table {{.Service}}\t{{.Status}}"
Make it executable and run:
chmod +x scripts/network-status.sh
./scripts/network-status.sh
Step 4: Essential Docker Management Commands
# View logs from all containers
docker compose logs -f

# View logs from specific container
docker compose logs -f node-1

# View last 100 lines
docker compose logs --tail=100 node-1

# Stop all containers
docker compose stop

# Start stopped containers
docker compose start

# Restart all containers
docker compose restart

# Stop and remove containers (keeps data)
docker compose down

# Stop, remove containers and volumes (DELETES ALL DATA)
docker compose down -v

# Execute command in running container
docker compose exec node-1 bash

# View resource usage
docker stats

# Check Besu version
docker compose exec node-1 besu --version
Part 4: Smart Contract Development with Local Hardhat
Now that your Besu network is running, you'll set up a local Hardhat environment on your development machine to deploy and interact with smart contracts.
Step 1: Initialize Hardhat Project Locally
# Navigate to smart-contracts directory
cd smart-contracts

# Initialize Hardhat (use Hardhat v2)
npx hardhat --init
Step
2: Configure Hardhat for Besu Network
Create or Update smart-contracts/hardhat.config.js:
require('@nomicfoundation/hardhat-toolbox');

module.exports = {
  solidity: {
    version: '0.8.28', // Use this or your project's Solidity version configured in Hardhat
    settings: {
      optimizer: {
        enabled: true,
        runs: 200,
      },
    },
  },
  networks: {
    besu: {
      url: 'http://localhost:8548', // Node-4 RPC endpoint
      chainId: 1337,
      accounts: [
        '0x8f2a55949038a9610f50fb23b5883af3b4ecb3c3bb792cbcefbd1542c692be63',
      ],
      gasPrice: 0,
      gas: 10000000,
    },
  },
  paths: {
    sources: './contracts',
    tests: './test',
    cache: './cache',
    artifacts: './artifacts',
  },
};
Network Configuration Explained:
- url: Points to Node-4 (RPC node) at
localhost:8548 - chainId: Must match the chainId in your genesis file (1337)
- accounts: Private key for the pre-funded account from genesis
- gasPrice: Set to 0 for free transactions in private network
- gas: High gas limit for complex contracts
Step 3: Create Smart Contract
Create smart-contracts/contracts/SimpleStorage.sol:
// SPDX-License-Identifier: MIT
pragma solidity ^0.8.28;

contract SimpleStorage {
    uint256 private storedData;
    address public owner;

    event DataStored(uint256 indexed newValue, address indexed setter, uint256 timestamp);
    event OwnershipTransferred(address indexed previousOwner, address indexed newOwner);

    modifier onlyOwner() {
        require(msg.sender == owner, "Only owner can call this function");
        _;
    }

    constructor(uint256 initialValue) {
        owner = msg.sender;
        storedData = initialValue;
        emit DataStored(initialValue, msg.sender, block.timestamp);
    }

    function set(uint256 newValue) public {
        storedData = newValue;
        emit DataStored(newValue, msg.sender, block.timestamp);
    }

    function get() public view returns (uint256) {
        return storedData;
    }

    function increment() public {
        storedData += 1;
        emit DataStored(storedData, msg.sender, block.timestamp);
    }

    function decrement() public {
        require(storedData > 0, "Value cannot go below zero");
        storedData -= 1;
        emit DataStored(storedData, msg.sender, block.timestamp);
    }

    function transferOwnership(address newOwner) public onlyOwner {
        require(newOwner != address(0), "New owner cannot be zero address");
        address previousOwner = owner;
        owner = newOwner;
        emit OwnershipTransferred(previousOwner, newOwner);
    }
}
Step 4: Create Deployment Script
Create smart-contracts/scripts/deploy.js:
const hre = require('hardhat');
const fs = require('fs');

async function main() {
  console.log('🚀 Starting deployment to Besu network...\n');

  const initialValue = 42;

  // Get deployer account
  const [deployer] = await hre.ethers.getSigners();
  console.log('Deploying contracts with account:', deployer.address);

  // Check balance
  const balance = await hre.ethers.provider.getBalance(deployer.address);
  console.log('Account balance:', hre.ethers.formatEther(balance), 'ETH\n');

  // Get current block number
  const blockNumber = await hre.ethers.provider.getBlockNumber();
  console.log('Current block number:', blockNumber);

  // Deploy SimpleStorage
  console.log('\n📝 Deploying SimpleStorage contract...');
  const SimpleStorage = await hre.ethers.getContractFactory('SimpleStorage');
  const gasPrice = hre.ethers.parseUnits('1', 'gwei'); // 1 gwei
  const simpleStorage = await SimpleStorage.deploy(initialValue, {
    gasPrice: gasPrice,
  });

  await simpleStorage.waitForDeployment();

  const address = await simpleStorage.getAddress();
  console.log('✅ SimpleStorage deployed to:', address);
  console.log('Initial value:', await simpleStorage.get());

  // Get deployment transaction details
  const deploymentTx = simpleStorage.deploymentTransaction();
  const receipt = await deploymentTx.wait();

  console.log('\n📊 Deployment Transaction:');
  console.log('  Hash:', deploymentTx.hash);
  console.log('  Block:', receipt.blockNumber);
  console.log('  Gas Used:', receipt.gasUsed.toString());
  console.log('  Status:', receipt.status === 1 ? '✅ Success' : '❌ Failed');

  // Save deployment info
  const deployment = {
    network: hre.network.name,
    chainId: (await hre.ethers.provider.getNetwork()).chainId.toString(),
    contractAddress: address,
    deployer: deployer.address,
    initialValue: initialValue,
    blockNumber: receipt.blockNumber,
    transactionHash: deploymentTx.hash,
    gasUsed: receipt.gasUsed.toString(),
    timestamp: new Date().toISOString(),
  };

  console.log('\n📄 Deployment Summary:');
  console.log(JSON.stringify(deployment, null, 2));

  // Save to file
  const deploymentsFile = 'deployments.json';
  let deployments = [];

  if (fs.existsSync(deploymentsFile)) {
    deployments = JSON.parse(fs.readFileSync(deploymentsFile, 'utf8'));
  }

  deployments.push(deployment);
  fs.writeFileSync(deploymentsFile, JSON.stringify(deployments, null, 2));

  console.log(`\n💾 Deployment info saved to ${deploymentsFile}`);
  console.log('\n🎉 Deployment completed successfully!');
}

main()
  .then(() => process.exit(0))
  .catch((error) => {
    console.error('❌ Deployment failed:', error);
    process.exit(1);
  });
Step 5: Deploy Contract Using Local Hardhat
Compile and deploy the smart contract:
# Compile contracts
npx hardhat compile

# Deploy to Besu network
npx hardhat run scripts/deploy.js --network besu
Expected output:
🚀 Starting deployment to Besu network...

Deploying contracts with account: 0xFE3B557E8Fb62b89F4916B721be55cEb828dBd73
Account balance: 904625697166532776746648320380374280103671755200316906558.262375061821325312 ETH

Current block number: 673

📝 Deploying SimpleStorage contract...
✅ SimpleStorage deployed to: 0x42699A7612A82f1d9C36148af9C77354759b210b
Initial value: 42n

📊 Deployment Transaction:
  Hash: 0xe742a1aa6d7f88898b95f993a41eb40b1e13181f5f5a8bec0542a6a0601aed44
  Block: 674
  Gas Used: 303383
  Status: ✅ Success

📄 Deployment Summary:
{
  "network": "besu",
  "chainId": "1337",
  "contractAddress": "0x42699A7612A82f1d9C36148af9C77354759b210b",
  "deployer": "0xFE3B557E8Fb62b89F4916B721be55cEb828dBd73",
  "initialValue": 42,
  "blockNumber": 674,
  "transactionHash": "0xe742a1aa6d7f88898b95f993a41eb40b1e13181f5f5a8bec0542a6a0601aed44",
  "gasUsed": "303383",
  "timestamp": "2025-10-25T11:32:49.452Z"
}

💾 Deployment info saved to deployments.json

🎉 Deployment completed successfully!
Part 5: Interacting with Deployed Smart Contracts
Step 1: Create Interaction Script
Create smart-contracts/scripts/interact.js:
const hre = require('hardhat');
const fs = require('fs');

async function main() {
  console.log('🔗 Interacting with SimpleStorage Contract\n');

  // Load deployment info
  const deploymentsFile = 'deployments.json';
  if (!fs.existsSync(deploymentsFile)) {
    console.error('❌ No deployments found. Please deploy the contract first.');
    process.exit(1);
  }
  const gasPrice = hre.ethers.parseUnits('1', 'gwei');

  const deployments = JSON.parse(fs.readFileSync(deploymentsFile, 'utf8'));
  const latestDeployment = deployments[deployments.length - 1];
  const contractAddress = latestDeployment.contractAddress;

  console.log('Contract Address:', contractAddress);
  console.log('Network:', hre.network.name);
  console.log('');

  // Get contract instance
  const SimpleStorage = await hre.ethers.getContractFactory('SimpleStorage');
  const simpleStorage = SimpleStorage.attach(contractAddress);

  // Get signer
  const [signer] = await hre.ethers.getSigners();
  console.log('Interacting as:', signer.address);
  console.log('');

  // Read current value
  console.log('📖 Reading current value...');
  const currentValue = await simpleStorage.get();
  console.log('Current stored value:', currentValue.toString());
  console.log('');
  const txOptions = { gasPrice };
  // Update value
  console.log('✏️  Setting new value to 123...');
  const setTx = await simpleStorage.set(123, txOptions);
  console.log('Transaction sent:', setTx.hash);
  const setReceipt = await setTx.wait();
  console.log('Transaction confirmed in block:', setReceipt.blockNumber);
  console.log('Gas used:', setReceipt.gasUsed.toString());
  console.log('Updated value:', (await simpleStorage.get()).toString());
  console.log('');

  // Increment value
  console.log('➕ Incrementing value...');
  const incTx = await simpleStorage.increment(txOptions);
  console.log('Transaction sent:', incTx.hash);
  await incTx.wait();
  console.log(
    'New value after increment:',
    (await simpleStorage.get()).toString()
  );
  console.log('');

  // Decrement value
  console.log('➖ Decrementing value...');
  const decTx = await simpleStorage.decrement(txOptions);
  await decTx.wait();
  console.log(
    'New value after decrement:',
    (await simpleStorage.get()).toString()
  );
  console.log('');

  // Query events
  console.log('📜 Recent DataStored events:');
  const filter = simpleStorage.filters.DataStored();
  const events = await simpleStorage.queryFilter(filter, -20);

  if (events.length === 0) {
    console.log('  No events found');
  } else {
    events.forEach((event, index) => {
      console.log(`  Event ${index + 1}:`);
      console.log(`    Value: ${event.args.newValue}`);
      console.log(`    Setter: ${event.args.setter}`);
      console.log(
        `    Timestamp: ${new Date(
          Number(event.args.timestamp) * 1000
        ).toISOString()}`
      );
      console.log(`    Block: ${event.blockNumber}`);
      console.log(`    Tx Hash: ${event.transactionHash}`);
      console.log('');
    });
  }

  // Get contract owner
  console.log('👤 Contract Information:');
  console.log('  Owner:', await simpleStorage.owner(txOptions));
  console.log('  Current Value:', (await simpleStorage.get()).toString());

  console.log('\n✅ Interaction completed successfully!');
}

main()
  .then(() => process.exit(0))
  .catch((error) => {
    console.error('❌ Interaction failed:', error);
    process.exit(1);
  });
Step 2: Execute Interaction Script
Run the interaction script:
# Interact with deployed contract
npx hardhat run scripts/interact.js --network besu
Expected output:
🔗 Interacting with SimpleStorage Contract

Contract Address: 0x42699A7612A82f1d9C36148af9C77354759b210b
Network: besu

Interacting as: 0xFE3B557E8Fb62b89F4916B721be55cEb828dBd73

📖 Reading current value...
Current stored value: 42

✏️  Setting new value to 123...
Transaction sent: 0x1f06e5d8b85336ff359d9558f39388c009a46e722a7558a89548e9ddba456a1c
Transaction confirmed in block: 746
Gas used: 28253
Updated value: 123

➕ Incrementing value...
Transaction sent: 0xde608c22f6da0b7a5dc57c154958ed2ef2cd95bf6c475ef7a8a41db2311ce4c8
New value after increment: 124

➖ Decrementing value...
New value after decrement: 123

📜 Recent DataStored events:
  Event 1:
    Value: 123
    Setter: 0xFE3B557E8Fb62b89F4916B721be55cEb828dBd73
    Timestamp: 2025-10-25T11:35:13.000Z
    Block: 746
    Tx Hash: 0x1f06e5d8b85336ff359d9558f39388c009a46e722a7558a89548e9ddba456a1c

  Event 2:
    Value: 124
    Setter: 0xFE3B557E8Fb62b89F4916B721be55cEb828dBd73
    Timestamp: 2025-10-25T11:35:15.000Z
    Block: 747
    Tx Hash: 0xde608c22f6da0b7a5dc57c154958ed2ef2cd95bf6c475ef7a8a41db2311ce4c8

  Event 3:
    Value: 123
    Setter: 0xFE3B557E8Fb62b89F4916B721be55cEb828dBd73
    Timestamp: 2025-10-25T11:35:17.000Z
    Block: 748
    Tx Hash: 0x30f9bd4b0d8094e500f2626ee39618519339ac3511fedbeef24261affce62d69

👤 Contract Information:
  Owner: 0xFE3B557E8Fb62b89F4916B721be55cEb828dBd73
  Current Value: 123

✅ Interaction completed successfully!
Part 6: Alternative Deployment Methods
Option 1: Using Web3.js
If you prefer using web3.js instead of Hardhat, here's how to deploy contracts:
Install web3.js:
npm install web3
Create deployment script smart-contracts/scripts/deploy-web3.js:
const { Web3 } = require('web3');
const fs = require('fs');
const path = require('path');

// Connect to Besu node
const web3 = new Web3('http://localhost:8548');

// Account configuration
const privateKey =
  '0x8f2a55949038a9610f50fb23b5883af3b4ecb3c3bb792cbcefbd1542c692be63';
const account = web3.eth.accounts.privateKeyToAccount(privateKey);
web3.eth.accounts.wallet.add(account);

async function deploy() {
  console.log('🚀 Deploying with Web3.js...\n');
  console.log('Using account:', account.address);

  // Load compiled contract
  const contractPath = path.join(
    __dirname,
    '../artifacts/contracts/SimpleStorage.sol/SimpleStorage.json'
  );
  const contractJson = JSON.parse(fs.readFileSync(contractPath, 'utf8'));

  const SimpleStorage = new web3.eth.Contract(contractJson.abi);

  // Check balance
  const balance = await web3.eth.getBalance(account.address);
  console.log('Balance:', web3.utils.fromWei(balance, 'ether'), 'ETH\n');

  // Deploy contract
  console.log('📝 Deploying SimpleStorage...');

  const deployTx = SimpleStorage.deploy({
    data: contractJson.bytecode,
    arguments: [42], // Initial value
  });

  const gas = await deployTx.estimateGas({ from: account.address });
  console.log('Estimated gas:', gas);

  const contract = await deployTx.send({
    from: account.address,
    gas: Number(gas) + 100000,
    gasPrice: web3.utils.toWei('1', 'gwei'),
  });

  console.log('\n✅ Contract deployed at:', contract.options.address);

  // Test contract
  const value = await contract.methods.get().call();
  console.log('Initial value:', value);

  // Save deployment info
  const deployment = {
    address: contract.options.address,
    deployer: account.address,
    timestamp: new Date().toISOString(),
  };

  fs.writeFileSync('deployment-web3.json', JSON.stringify(deployment, null, 2));

  console.log('\n💾 Deployment info saved to deployment-web3.json');
}

deploy()
  .then(() => process.exit(0))
  .catch((error) => {
    console.error('❌ Deployment failed:', error);
    process.exit(1);
  });
Run the deployment:
# First compile with Hardhat
npx hardhat compile

# Deploy using web3.js
node scripts/deploy-web3.js
Option 2: Using Remix IDE
Remix provides a user-friendly interface for contract deployment:
Step 1: Access Remix
Open Remix IDE in your browser.
Step 2: Create Contract
- Create a new file:
SimpleStorage.sol - Paste your Solidity code
- Compile the contract (Compiler tab)
Step 3: Connect to Besu Network
- Go to the "Deploy & Run Transactions" tab
- Select "Injected Provider - MetaMask" or "External Http Provider"
- If using External Http Provider, enter:
http://localhost:8548
Step 4: Configure MetaMask (Optional)
If using MetaMask:
- Open MetaMask
- Add Custom Network:
- Network Name: Besu Local
- RPC URL:
http://localhost:8548 - Chain ID: 1337
- Currency Symbol: ETH
- Import account using the private key from your genesis file
Step 5: Deploy Contract
- Set constructor parameter (e.g., 42)
- Click "Deploy"
- Confirm the transaction
- Contract address will appear in the "Deployed Contracts" section
Step 6: Interact with Contract
Use Remix's interface to:
- Call
get()to read the value - Call
set(uint256)to update the value - Call
increment()anddecrement() - View transaction logs and events
Part 7: Adding BlockScout Explorer for Network Visualization
After all those command-line interactions, things might start feeling a bit… exhausting, right? No visuals — just endless logs, hashes, and terminal output.
Let’s fix that. 👀
It’s time to bring your private network to life with BlockScout — a powerful, open-source blockchain explorer that provides a clean, interactive dashboard to visualize blocks, transactions, and smart contracts in real time.
With BlockScout, you can finally see your Besu network in action — making debugging, monitoring, and development not just easier, but also way more fun. 🚀
What is BlockScout?
BlockScout is a full-featured blockchain explorer that allows you to:
- View real-time block production and transactions
- Explore deployed smart contracts and their source code
- Monitor network statistics and validator performance
- Verify and interact with smart contracts directly from the UI
- Track token transfers and wallet balances
Step 1: Clone BlockScout Repository
First, clone the official BlockScout Docker setup:
# Navigate to your project root
cd besu-docker-network

# Clone BlockScout
git clone https://github.com/blockscout/blockscout.git blockscout-explorer

# Navigate to docker-compose directory
cd blockscout-explorer/docker-compose
Step 2: Configure BlockScout for Besu
Locate envs/common-blockscout.env and update or append the following variables at the end of the file. Existing values will be overwritten:
# Network Configuration
ETHEREUM_JSONRPC_VARIANT=besu
ETHEREUM_JSONRPC_HTTP_URL=http://host.docker.internal:8548
ETHEREUM_JSONRPC_TRACE_URL=http://host.docker.internal:8548
ETHEREUM_JSONRPC_WS_URL=ws://host.docker.internal:8548

# Chain Configuration
CHAIN_ID=1337
COIN=ETH
NETWORK=Besu Private Network
Important Configuration Note:
host.docker.internal: This special DNS name allows BlockScout container to access your host machine's ports (where Besu is running)
Step 3: Start BlockScout
Make sure your Besu network is running, then start BlockScout:
# Ensure you're in blockscout-explorer/docker-compose directory
cd blockscout-explorer/docker-compose

# Start BlockScout services
docker compose up -d

# Monitor startup logs
docker compose logs -f backend
Wait for the initialization - BlockScout needs to:
- Create and migrate the database (1-2 minutes)
- Start indexing blocks from your Besu network
- Boot up the frontend interface
Step 4: Access BlockScout Dashboard
Open your browser and navigate to:
- Frontend UI:
http://localhost:80 - API Backend:
http://localhost:80/api
First-time setup may take 2-3 minutes as BlockScout indexes your existing blocks.
Step 5: Explore Your Blockchain Visually
Once BlockScout is running, you can:
1. Monitor Real-Time Blocks
- View blocks being produced every 2 seconds
- See validator addresses confirming transactions
- Track gas usage and block rewards
2. Search and Track Transactions
# Deploy a contract to see it in BlockScout
cd ../../smart-contracts
npx hardhat run scripts/deploy.js --network besu

# Copy the contract address and search for it in BlockScout
Step 6: Managing BlockScout
# Stop BlockScout
docker compose down

# Stop and remove all data (fresh start)
docker compose down -v

# View logs
docker compose logs -f backend
docker compose logs -f frontend

# Restart services
docker compose restart
Now you have a complete development environment: a private Besu blockchain with full visual monitoring through BlockScout! 🎉
Conclusion
Congratulations! You've built a complete enterprise-grade blockchain development environment:
- Private Besu Network with QBFT consensus and Byzantine fault tolerance
- Docker Containerization for easy deployment and scaling
- Smart Contract Development with Hardhat and multiple deployment options
- Visual Block Explorer with BlockScout for intuitive network monitoring
This setup provides everything you need for:
- Enterprise blockchain development with production-ready infrastructure
- Private DApp testing in an isolated, controlled environment
- Smart contract experimentation with real-time visual feedback
- Team collaboration with containerized, reproducible environments
Next Steps
Ready to Scale?
- Add more validator nodes for increased decentralization
- Set up load balancing for high-throughput applications
- Deploy to cloud infrastructure (AWS, Azure, GCP) or Kubernetes clusters
Want to Build Custom Blockchain Solutions?
- Integrate advanced features like private transactions and on-chain governance
- Develop custom consensus mechanisms for your business needs
- Build production-ready DApps with monitoring and analytics
- Implement cross-chain bridges and interoperability solutions
Need Help with Your Blockchain Project? 🚀
I specialize in building and scaling blockchain systems, including:
- Private Blockchain Networks — Besu, Quorum, and Hyperledger Fabric setups
- Smart Contracts — Solidity development, auditing, and optimization
- Enterprise DApps — End-to-end decentralized application development
📩 Let’s collaborate on your next blockchain project. Contact me here
Useful Resources
"From zero to production-ready blockchain in under an hour. This is the power of modern blockchain infrastructure."
Found this guide helpful? Share it with your team, and let me know what you build! Happy blockchain development! 🎉