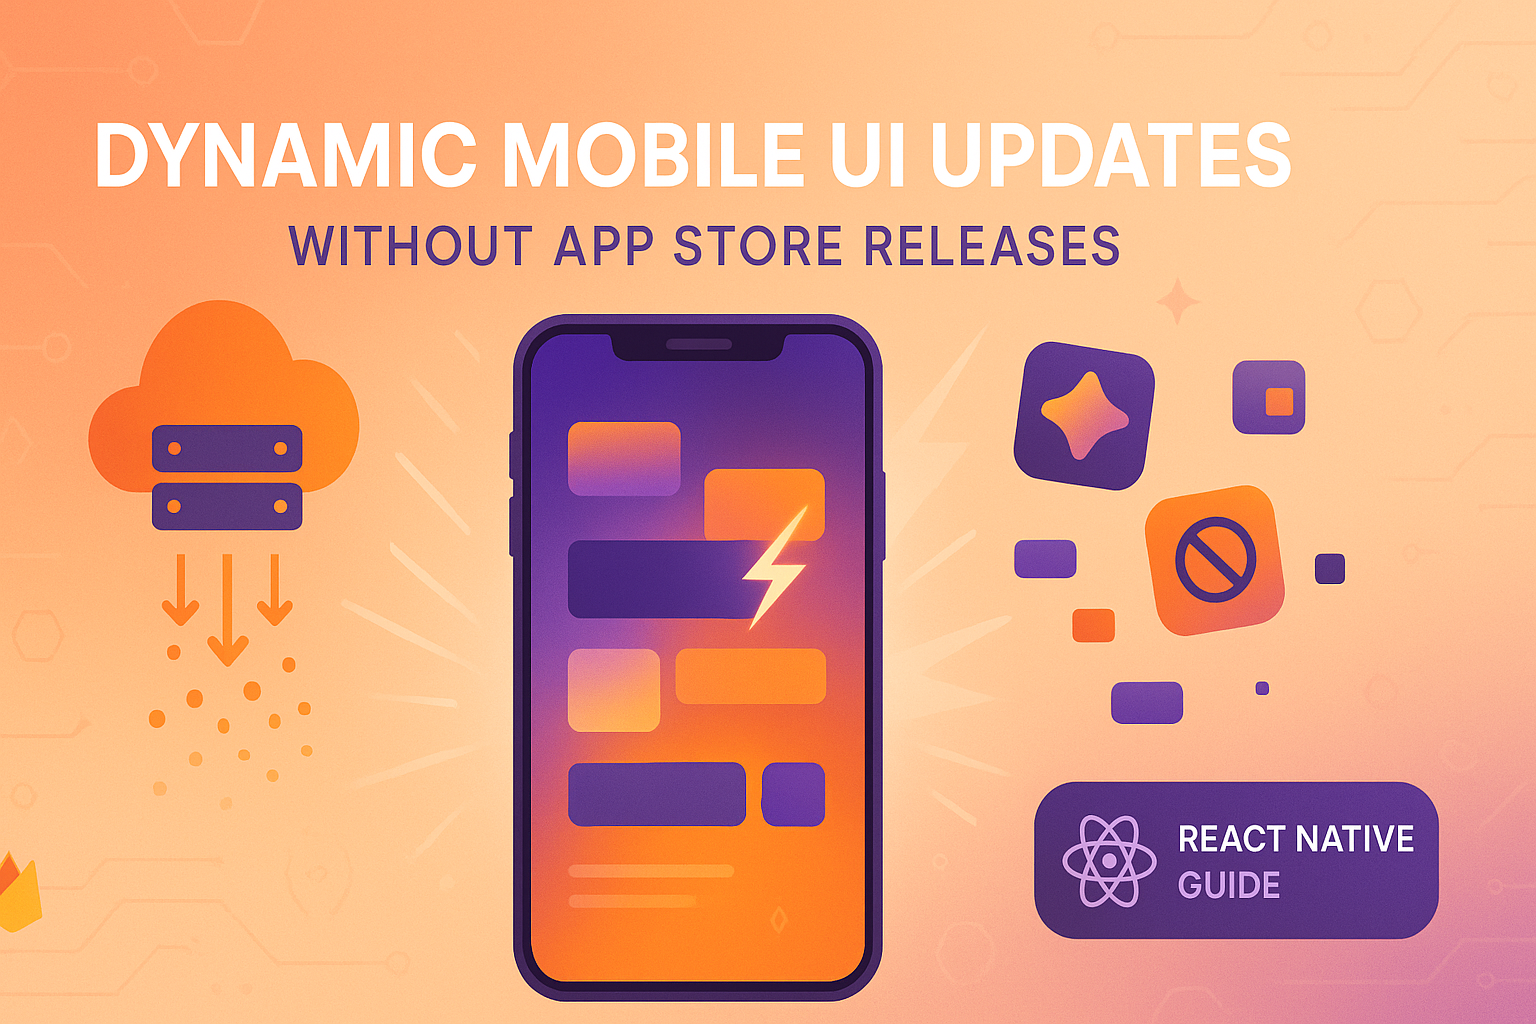
Introduction
Ever opened an app like Swiggy or Amazon and seen a completely new homepage, even though you never updated the app? That’s not magic—it’s just smart UI delivery. Instead of shipping every small UI change through the Play Store, teams push a lot of it from the backend.
In real life this matters a lot. Maybe a banner is broken for a Diwali sale, or you want to try a new checkout flow with only 5% of users first. Waiting for Play Store review feels painful in those cases, so most serious apps now use some form of “dynamic UI”.
What you'll learn:
- Building a server-driven UI system from scratch
- Using Firebase Remote Config for instant feature control
- Changing app icons dynamically on Android
- Embedding web content in native apps
- Leveraging Play Store's Asset Delivery for on-demand resources
🧪 Update: A complete working React Native demo (with SDUI, Remote Config, WebView) is now live — Find the GitHub link at the end of this article.
What Are Dynamic UI Updates?
Dynamic UI updates let you modify your app's interface after it's installed on users' devices. Instead of hardcoding every screen, you build a flexible rendering system that receives its configuration from a remote server.
Core benefits:
- Speed: Deploy changes in minutes instead of waiting for store approval
- Experimentation: A/B test layouts with specific user segments
- Agility: Fix UI bugs without emergency releases
- Personalization: Show different interfaces based on user preferences or behavior
- Remote control: Disable broken features instantly without an update
Method 1: Server-Driven UI (SDUI)
Server-Driven UI is the most powerful approach. Your app becomes a rendering engine that interprets JSON blueprints sent by your server. The server controls what components appear, their order, styling, and behavior.
Architecture Overview
Instead of this (hardcoded):
function HomeScreen() {
  return (
    <View>
      <Banner image='sale.png' />
      <RestaurantGrid />
      <Button text='View Offers' />
    </View>
  );
}
You fetch a dynamic configuration:
{
  "screen": "home",
  "version": "2.1",
  "components": [
    {
      "type": "hero_banner",
      "imageUrl": "https://cdn.example.com/diwali-sale.png",
      "action": "navigate://products/sale"
    },
    {
      "type": "restaurant_grid",
      "layout": "2-column",
      "restaurantIds": ["rest_1", "rest_2", "rest_3", "rest_4"]
    },
    {
      "type": "cta_button",
      "text": "Explore Offers",
      "backgroundColor": "#FF6B6B",
      "textColor": "#FFFFFF",
      "action": "navigate://offers"
    }
  ]
}
Your React Native app's job is to parse this JSON and map each type to a real component.
Implementation in React Native
Here's a complete SDUI renderer for React Native:
import React, { useEffect, useState } from "react";
import {
  View,
  Text,
  Image,
  TouchableOpacity,
  ScrollView,
  StyleSheet,
  ActivityIndicator,
} from "react-native";
import { useNavigation } from "@react-navigation/native";

interface ComponentConfig {
  type: string;
  [key: string]: any;
}

interface ScreenConfig {
  screen: string;
  version: string;
  components: ComponentConfig[];
}

const HeroBanner = ({ imageUrl, action }: any) => {
  const navigation = useNavigation();

  return (
    <TouchableOpacity onPress={() => handleAction(action, navigation)}>
      <Image
        source={{ uri: imageUrl }}
        style={styles.banner}
        resizeMode='cover'
      />
    </TouchableOpacity>
  );
};

const CtaButton = ({ text, backgroundColor, textColor, action }: any) => {
  const navigation = useNavigation();

  return (
    <TouchableOpacity
      style={[styles.button, { backgroundColor }]}
      onPress={() => handleAction(action, navigation)}
    >
      <Text style={[styles.buttonText, { color: textColor }]}>{text}</Text>
    </TouchableOpacity>
  );
};

const RestaurantGrid = ({ restaurantIds, layout }: any) => {
  // In a real app, you'd fetch details for these IDs
  return (
    <View style={styles.grid}>
      {restaurantIds.map((id: string) => (
        <View
          key={id}
          style={
            layout === "2-column" ? styles.gridItemHalf : styles.gridItemFull
          }
        >
          <Text>Restaurant {id}</Text>
        </View>
      ))}
    </View>
  );
};

const ComponentRegistry: { [key: string]: React.ComponentType<any> } = {
  hero_banner: HeroBanner,
  restaurant_grid: RestaurantGrid,
  cta_button: CtaButton,
};

// Main dynamic screen renderer
function DynamicScreen({ screenId }: { screenId: string }) {
  const [config, setConfig] = useState<ScreenConfig | null>(null);
  const [loading, setLoading] = useState(true);
  const [error, setError] = useState(false);

  useEffect(() => {
    fetchScreenConfig(screenId);
  }, [screenId]);

  const fetchScreenConfig = async (id: string) => {
    try {
      const response = await fetch(`https://api.yourapp.com/screens/${id}`);

      if (!response.ok) throw new Error("Failed to fetch config");

      const data = await response.json();
      setConfig(data);
      setError(false);
    } catch (err) {
      console.error("Screen config fetch error:", err);
      setError(true);
      // Load from cache as fallback
    } finally {
      setLoading(false);
    }
  };

  if (loading) {
    return (
      <View style={styles.centerContainer}>
        <ActivityIndicator size='large' color='#007AFF' />
      </View>
    );
  }

  if (error || !config) {
    return (
      <View style={styles.centerContainer}>
        <Text style={styles.errorText}>
          Unable to load content. Please check your connection.
        </Text>
        <TouchableOpacity
          style={styles.retryButton}
          onPress={() => fetchScreenConfig(screenId)}
        >
          <Text style={styles.retryText}>Retry</Text>
        </TouchableOpacity>
      </View>
    );
  }

  return (
    <ScrollView style={styles.container}>
      {config.components.map((componentConfig, index) => {
        const Component = ComponentRegistry[componentConfig.type];

        if (!Component) {
          console.warn(`Unknown component: ${componentConfig.type}`);
          return null;
        }

        return (
          <Component
            key={`${componentConfig.type}-${index}`}
            {...componentConfig}
          />
        );
      })}
    </ScrollView>
  );
}

const handleAction = (action: string, navigation: any) => {
  if (!action) return;

  if (action.startsWith("navigate://")) {
    const route = action.replace("navigate://", "");
    const parts = route.split("/");
    const screenName = parts[0];
    const params = parts.slice(1);

    // Map route to actual screen names
    const screenMap: { [key: string]: string } = {
      products: "ProductList",
      offers: "OffersList",
      profile: "UserProfile",
    };

    const targetScreen = screenMap[screenName] || screenName;
    navigation.navigate(targetScreen, {
      category: params.join("/"),
    });
  }
};

const styles = StyleSheet.create({
  container: {
    flex: 1,
    backgroundColor: "#fff",
  },
  centerContainer: {
    flex: 1,
    justifyContent: "center",
    alignItems: "center",
    padding: 20,
  },
  banner: {
    width: "100%",
    height: 200,
    borderRadius: 12,
    marginBottom: 16,
  },
  button: {
    padding: 16,
    borderRadius: 8,
    alignItems: "center",
    marginVertical: 12,
    marginHorizontal: 16,
  },
  buttonText: {
    fontSize: 16,
    fontWeight: "600",
  },
  grid: {
    flexDirection: "row",
    flexWrap: "wrap",
    justifyContent: "space-between",
    padding: 16,
  },
  gridItemHalf: {
    width: "48%",
    height: 150,
    backgroundColor: "#f5f5f5",
    marginBottom: 12,
    borderRadius: 8,
    justifyContent: "center",
    alignItems: "center",
  },
  gridItemFull: {
    width: "100%",
    height: 150,
    backgroundColor: "#f5f5f5",
    marginBottom: 12,
    borderRadius: 8,
    justifyContent: "center",
    alignItems: "center",
  },
  errorText: {
    fontSize: 16,
    color: "#666",
    textAlign: "center",
    marginBottom: 16,
  },
  retryButton: {
    paddingHorizontal: 24,
    paddingVertical: 12,
    backgroundColor: "#007AFF",
    borderRadius: 8,
  },
  retryText: {
    color: "#fff",
    fontSize: 16,
    fontWeight: "600",
  },
});

export default DynamicScreen;
Real-World Example: Swiggy
If you want to see SDUI in action, just open Swiggy. The home screen, restaurant cards, banners, even some parts of the checkout flow are driven by configs instead of hardcoded screens. You’ll notice the UI changing a lot around IPL, Diwali, New Year, etc.
Their team has written publicly about how they built a widget system that renders different layouts from JSON. We obviously don’t have Swiggy-level scale, but the idea is similar:
-
server decides what the screen looks like
-
app just knows how to render those building blocks
If you’re curious about the deep dive, their engineering blog is worth reading.
(Reference: Swiggy's SDUI Engineering Blog)
Method 2: Remote Configuration with Firebase
For simpler changes—toggling features, updating colors, or changing text—full SDUI is overkill. Firebase Remote Config lets you control app behavior through a web dashboard, perfect for feature flags and gradual rollouts.
Setup and Implementation
Install the Firebase Remote Config package:
npm install @react-native-firebase/app @react-native-firebase/remote-config
Create a configuration wrapper:
import remoteConfig from "@react-native-firebase/remote-config";
import React, { useEffect, useState, createContext, useContext } from "react";
import { View, Text, TouchableOpacity, StyleSheet } from "react-native";

// Default values (used when network is unavailable)
const DEFAULTS = {
  enable_new_checkout: false,
  primary_color: "#007AFF",
  home_layout: "grid",
  banner_message: "Welcome to our app!",
  max_cart_items: 20,
};

type ConfigType = typeof DEFAULTS;

const ConfigContext = createContext<ConfigType>(DEFAULTS);

export const RemoteConfigProvider = ({
  children,
}: {
  children: React.ReactNode;
}) => {
  const [config, setConfig] = useState<ConfigType>(DEFAULTS);
  const [initialized, setInitialized] = useState(false);

  useEffect(() => {
    initializeRemoteConfig();
  }, []);

  const initializeRemoteConfig = async () => {
    try {
      await remoteConfig().setDefaults(DEFAULTS);

      await remoteConfig().setConfigSettings({
        minimumFetchIntervalMillis: 3600000,
      });

      // Fetch and activate config
      const fetchedRemotely = await remoteConfig().fetchAndActivate();

      if (fetchedRemotely) {
        console.log("Config fetched from backend");
      } else {
        console.log("Config not fetched, using cached values");
      }

      const allValues = remoteConfig().getAll();
      const parsedConfig: any = { ...DEFAULTS };

      Object.entries(allValues).forEach(([key, entry]) => {
        const value = entry.asString();

        if (value === "true" || value === "false") {
          parsedConfig[key] = value === "true";
        } else if (!isNaN(Number(value))) {
          parsedConfig[key] = Number(value);
        } else {
          parsedConfig[key] = value;
        }
      });

      setConfig(parsedConfig);
      setInitialized(true);
    } catch (error) {
      console.error("Remote config initialization failed:", error);
      setInitialized(true);
    }
  };

  return (
    <ConfigContext.Provider value={config}>{children}</ConfigContext.Provider>
  );
};

export const useRemoteConfig = () => {
  const context = useContext(ConfigContext);
  if (!context) {
    throw new Error("useRemoteConfig must be used within RemoteConfigProvider");
  }
  return context;
};

// Example usage in a component
function HomeScreen() {
  const config = useRemoteConfig();

  return (
    <View style={styles.container}>
      <View style={styles.banner}>
        <Text style={styles.bannerText}>{config.banner_message}</Text>
      </View>

      {config.enable_new_checkout && (
        <View style={styles.newFeature}>
          <Text>✨ Try our new checkout experience!</Text>
        </View>
      )}

      {config.home_layout === "grid" ? <GridView /> : <ListView />}

      <TouchableOpacity
        style={[styles.actionButton, { backgroundColor: config.primary_color }]}
      >
        <Text style={styles.buttonText}>Get Started</Text>
      </TouchableOpacity>
    </View>
  );
}

const GridView = () => <Text>Grid Layout</Text>;
const ListView = () => <Text>List Layout</Text>;

const styles = StyleSheet.create({
  container: {
    flex: 1,
    padding: 16,
    backgroundColor: "#fff",
  },
  banner: {
    padding: 16,
    backgroundColor: "#f0f0f0",
    borderRadius: 8,
    marginBottom: 16,
  },
  bannerText: {
    fontSize: 16,
    textAlign: "center",
  },
  newFeature: {
    padding: 12,
    backgroundColor: "#e3f2fd",
    borderRadius: 8,
    marginBottom: 16,
  },
  actionButton: {
    padding: 16,
    borderRadius: 8,
    alignItems: "center",
    marginTop: 16,
  },
  buttonText: {
    color: "#fff",
    fontSize: 16,
    fontWeight: "600",
  },
});
Advanced: User Segmentation and Targeting
Firebase Remote Config's real power lies in conditional targeting. In the Firebase console, create conditions like:
- User segment:
user_type == 'premium' - App version:
app_version >= 2.5.0 - Region:
device.country in ['IN', 'US'] - Custom attributes:
last_purchase_days < 7
You can then serve different config values to each segment. For example:
- Premium users see
enable_new_checkout = true - Users in India see
primary_color = '#FF9933'(saffron) - Version 2.5.0+ users get
home_layout = 'list'
This enables sophisticated A/B testing and gradual feature rollouts.
Real-World Example: Uber's Flipr
Uber built an internal platform called Flipr (Feature Flag Platform) that manages thousands of configuration flags across their apps. It controls everything from UI features to business logic parameters.
For example, during New Year's Eve, Uber can adjust surge pricing caps remotely, enable special "party mode" UI themes for specific cities, and roll out new safety features to 1% of riders first to monitor behavior before full deployment.
(Reference: Uber Engineering - Flipr)
Method 3: Dynamic App Icons (Android)
Want to change your app icon for holidays without releasing an update? Android supports this through activity aliases. You define multiple launcher icons in your manifest and programmatically enable the one you want.
Step 1: Configure AndroidManifest.xml
Edit android/app/src/main/AndroidManifest.xml:
<manifest xmlns:android="http://schemas.android.com/apk/res/android">
    <application
        android:name=".MainApplication"
        android:label="@string/app_name"
        android:icon="@mipmap/ic_launcher">

        <!-- Main activity (default icon) -->
        <activity
            android:name=".MainActivity"
            android:label="@string/app_name"
            android:configChanges="keyboard|keyboardHidden|orientation|screenSize"
            android:windowSoftInputMode="adjustResize"
            android:exported="true">
            <intent-filter>
                <action android:name="android.intent.action.MAIN" />
                <category android:name="android.intent.category.LAUNCHER" />
            </intent-filter>
        </activity>

        <!-- Winter/Holiday icon -->
        <activity-alias
            android:name=".MainActivityWinter"
            android:enabled="false"
            android:exported="true"
            android:icon="@mipmap/ic_launcher_winter"
            android:label="@string/app_name"
            android:targetActivity=".MainActivity">
            <intent-filter>
                <action android:name="android.intent.action.MAIN" />
                <category android:name="android.intent.category.LAUNCHER" />
            </intent-filter>
        </activity-alias>

        <!-- Summer icon -->
        <activity-alias
            android:name=".MainActivitySummer"
            android:enabled="false"
            android:exported="true"
            android:icon="@mipmap/ic_launcher_summer"
            android:label="@string/app_name"
            android:targetActivity=".MainActivity">
            <intent-filter>
                <action android:name="android.intent.action.MAIN" />
                <category android:name="android.intent.category.LAUNCHER" />
            </intent-filter>
        </activity-alias>

    </application>
</manifest>
Important: Place your alternative icons (ic_launcher_winter.png, ic_launcher_summer.png) in android/app/src/main/res/mipmap-* folders at all densities (mdpi, hdpi, xhdpi, xxhdpi, xxxhdpi).
Step 2: Create Native Module for Icon Switching
Create android/app/src/main/java/com/yourappname/IconSwitcherModule.kt:
package com.yourappname;

import android.content.ComponentName
import android.content.pm.PackageManager
import com.facebook.react.bridge.Promise
import com.facebook.react.bridge.ReactApplicationContext
import com.facebook.react.bridge.ReactContextBaseJavaModule
import com.facebook.react.bridge.ReactMethod

class IconSwitcherModule(
  reactContext: ReactApplicationContext
) : ReactContextBaseJavaModule(reactContext) {

  override fun getName(): String = "IconSwitcher"

  @ReactMethod
  fun changeIcon(iconName: String, promise: Promise) {
    try {
      val context = reactApplicationContext
      val packageName = context.packageName
      val pm: PackageManager = context.packageManager

      val aliases = arrayOf(
        "$packageName.MainActivityWinter",
        "$packageName.MainActivitySummer"
      )

      // Disable all aliases
      for (alias in aliases) {
        pm.setComponentEnabledSetting(
          ComponentName(packageName, alias),
          PackageManager.COMPONENT_ENABLED_STATE_DISABLED,
          PackageManager.DONT_KILL_APP
        )
      }

      val selectedAlias = when (iconName.lowercase()) {
        "winter" -> "$packageName.MainActivityWinter"
        "summer" -> "$packageName.MainActivitySummer"
        "default" -> {
          promise.resolve("Switched to default icon")
          return
        }
        else -> {
          promise.reject("INVALID_ICON", "Icon name not recognized")
          return
        }
      }

      pm.setComponentEnabledSetting(
        ComponentName(packageName, selectedAlias),
        PackageManager.COMPONENT_ENABLED_STATE_ENABLED,
        PackageManager.DONT_KILL_APP
      )

      promise.resolve("Icon changed to: $iconName")
    } catch (e: Exception) {
      promise.reject("ICON_CHANGE_ERROR", e.message, e)
    }
  }
}
Create IconSwitcherPackage.kt:
package com.yourappname;

import com.facebook.react.ReactPackage
import com.facebook.react.bridge.NativeModule
import com.facebook.react.bridge.ReactApplicationContext
import com.facebook.react.uimanager.ViewManager

class IconSwitcherPackage : ReactPackage {

  override fun createNativeModules(
    reactContext: ReactApplicationContext
  ): MutableList<NativeModule> {
    val modules = ArrayList<NativeModule>()
    modules.add(IconSwitcherModule(reactContext))
    return modules
  }

  override fun createViewManagers(
    reactContext: ReactApplicationContext
  ): MutableList<ViewManager<*, *>> = mutableListOf()
}
Register the module in MainApplication.kt:
package com.yourappname;

import android.app.Application
import com.facebook.react.PackageList
import com.facebook.react.ReactApplication
import com.facebook.react.ReactHost
import com.facebook.react.ReactNativeApplicationEntryPoint.loadReactNative
import com.facebook.react.defaults.DefaultReactHost.getDefaultReactHost

class MainApplication : Application(), ReactApplication {

  override val reactHost: ReactHost by lazy {
    getDefaultReactHost(
      context = applicationContext,
      packageList =
        PackageList(this).packages.apply {
          // Register Package Here
          add(IconSwitcherPackage())
        },
    )
  }

  override fun onCreate() {
    super.onCreate()
    loadReactNative(this)
  }
}
Step 3: Use in React Native
import React from "react";
import {
  View,
  Text,
  TouchableOpacity,
  StyleSheet,
  Alert,
  NativeModules,
} from "react-native";

const { IconSwitcher } = NativeModules;

function IconSettingsScreen() {
  const changeAppIcon = async (iconName: string) => {
    try {
      if (!IconSwitcher) {
        Alert.alert("Error", "Icon switcher is not available");
        return;
      }

      const result = await IconSwitcher.changeIcon(iconName);
      Alert.alert(
        "Success",
        "App icon will update shortly! It may take a few seconds to appear.",
        [{ text: "OK" }]
      );
    } catch (error) {
      console.error("Icon change error:", error);
      Alert.alert("Error", "Failed to change app icon");
    }
  };

  return (
    <View style={styles.container}>
      <Text style={styles.title}>Choose App Icon</Text>

      <TouchableOpacity
        style={styles.iconOption}
        onPress={() => changeAppIcon("default")}
      >
        <Text style={styles.iconLabel}>🏠 Default Icon</Text>
      </TouchableOpacity>

      <TouchableOpacity
        style={styles.iconOption}
        onPress={() => changeAppIcon("winter")}
      >
        <Text style={styles.iconLabel}>❄️ Winter Icon</Text>
      </TouchableOpacity>

      <TouchableOpacity
        style={styles.iconOption}
        onPress={() => changeAppIcon("summer")}
      >
        <Text style={styles.iconLabel}>☀️ Summer Icon</Text>
      </TouchableOpacity>
    </View>
  );
}

const styles = StyleSheet.create({
  container: {
    flex: 1,
    padding: 20,
    backgroundColor: "#fff",
  },
  title: {
    fontSize: 24,
    fontWeight: "bold",
    marginBottom: 24,
  },
  iconOption: {
    padding: 16,
    backgroundColor: "#f5f5f5",
    borderRadius: 8,
    marginBottom: 12,
  },
  iconLabel: {
    fontSize: 18,
  },
});

export default IconSettingsScreen;
Automating Icon Changes with Remote Config
Combine dynamic icons with Firebase Remote Config to automatically change icons for all users:
useEffect(() => {
  const config = useRemoteConfig();
  const seasonalIcon = config.current_app_icon; // e.g., 'winter', 'summer', 'default'

  if (seasonalIcon && IconSwitcher) {
    IconSwitcher.changeIcon(seasonalIcon);
  }
}, []);
Method 4: Web Content in Native Apps
For content that changes frequently—help articles, promotional pages, event details—rendering them natively is inefficient. Use WebView to embed web content while maintaining native navigation and functionality.
Basic WebView Implementation
import React, { useState, useEffect } from "react";
import { WebView } from "react-native-webview";
import { View, ActivityIndicator, StyleSheet } from "react-native";
import { useNavigation } from "@react-navigation/native";

function DynamicContentScreen() {
  const [contentUrl, setContentUrl] = useState<string | null>(null);
  const [loading, setLoading] = useState(true);
  const navigation = useNavigation();

  useEffect(() => {
    fetchContentUrl();
  }, []);

  const fetchContentUrl = async () => {
    try {
      const response = await fetch("https://api.yourapp.com/content-config");
      const data = await response.json();
      setContentUrl(data.helpCenterUrl);
    } catch (error) {
      console.error("Failed to fetch content URL:", error);
      setContentUrl("https://yourapp.com/help"); // Fallback
    } finally {
      setLoading(false);
    }
  };

  // JavaScript to inject into WebView for bi-directional communication
  const injectedJavaScript = `
    (function() {
      // Listen for link clicks with custom data attributes
      document.addEventListener('click', function(event) {
        const target = event.target.closest('[data-native-action]');
        if (target) {
          event.preventDefault();
          const action = target.getAttribute('data-native-action');
          const params = target.getAttribute('data-params');

          window.ReactNativeWebView.postMessage(JSON.stringify({
            type: 'native_action',
            action: action,
            params: params ? JSON.parse(params) : {}
          }));
        }
      });

      // Custom back button handler
      const backButton = document.querySelector('[data-back-button]');
      if (backButton) {
        backButton.addEventListener('click', function(e) {
          e.preventDefault();
          window.ReactNativeWebView.postMessage(JSON.stringify({
            type: 'navigate_back'
          }));
        });
      }
    })();
    true;
  `;

  const handleMessage = (event: any) => {
    try {
      const data = JSON.parse(event.nativeEvent.data);

      switch (data.type) {
        case "native_action":
          // Handle custom actions (e.g., open native screen)
          if (data.action === "open_profile") {
            navigation.navigate("Profile", data.params);
          } else if (data.action === "open_cart") {
            navigation.navigate("Cart");
          }
          break;

        case "navigate_back":
          navigation.goBack();
          break;

        default:
          console.warn("Unknown message type:", data.type);
      }
    } catch (error) {
      console.error("Error handling WebView message:", error);
    }
  };

  if (loading) {
    return (
      <View style={styles.loadingContainer}>
        <ActivityIndicator size='large' color='#007AFF' />
      </View>
    );
  }

  return (
    <WebView
      source={{ uri: contentUrl || "about:blank" }}
      style={styles.webview}
      injectedJavaScript={injectedJavaScript}
      onMessage={handleMessage}
      javaScriptEnabled={true}
      domStorageEnabled={true}
      startInLoadingState={true}
      renderLoading={() => (
        <ActivityIndicator
          style={styles.webviewLoader}
          size='large'
          color='#007AFF'
        />
      )}
    />
  );
}

const styles = StyleSheet.create({
  loadingContainer: {
    flex: 1,
    justifyContent: "center",
    alignItems: "center",
    backgroundColor: "#fff",
  },
  webview: {
    flex: 1,
  },
  webviewLoader: {
    position: "absolute",
    top: "50%",
    left: "50%",
    marginLeft: -20,
    marginTop: -20,
  },
});

export default DynamicContentScreen;
Your HTML page would include:
<a href="#" data-native-action="open_profile" data-params='{"userId": "123"}'>
  View Your Profile
</a>

<button data-native-action="open_cart">Go to Cart</button>

<button data-back-button>← Back</button>
Hybrid Approach: Native + Web Components
Mix native and web elements on the same screen for optimal user experience:
import React, { useEffect, useState } from "react";
import {
  View,
  Text,
  Image,
  TouchableOpacity,
  ScrollView,
  StyleSheet,
} from "react-native";
import { WebView } from "react-native-webview";

function HybridProductScreen({ route }: any) {
  const { productId } = route.params;
  const [product, setProduct] = useState<any>(null);

  useEffect(() => {
    fetchProduct(productId);
  }, [productId]);

  const fetchProduct = async (id: string) => {
    const response = await fetch(`https://api.yourapp.com/products/${id}`);
    const data = await response.json();
    setProduct(data);
  };

  if (!product) {
    return <Text>Loading...</Text>;
  }

  return (
    <ScrollView style={styles.container}>
      {/* Native components for performance-critical UI */}
      <Image
        source={{ uri: product.imageUrl }}
        style={styles.productImage}
        resizeMode='cover'
      />

      <View style={styles.productHeader}>
        <Text style={styles.productName}>{product.name}</Text>
        <Text style={styles.productPrice}>${product.price}</Text>
      </View>

      {/* Web content for rich, frequently updated descriptions */}
      <WebView
        source={{ html: product.richDescriptionHtml }}
        style={styles.descriptionWebView}
        scrollEnabled={false}
        injectedJavaScript={`
          // Auto-resize WebView to content height
          window.ReactNativeWebView.postMessage(
            JSON.stringify({
              type: 'content_height',
              height: document.body.scrollHeight
            })
          );
          true;
        `}
        onMessage={(event) => {
          try {
            const data = JSON.parse(event.nativeEvent.data);
            if (data.type === "content_height") {
              // You can dynamically adjust height if needed
              console.log("Content height:", data.height);
            }
          } catch (e) {}
        }}
      />

      {/* Native action buttons */}
      <TouchableOpacity style={styles.addToCartButton}>
        <Text style={styles.buttonText}>Add to Cart</Text>
      </TouchableOpacity>

      <TouchableOpacity style={styles.buyNowButton}>
        <Text style={styles.buttonText}>Buy Now</Text>
      </TouchableOpacity>
    </ScrollView>
  );
}

const styles = StyleSheet.create({
  container: {
    flex: 1,
    backgroundColor: "#fff",
  },
  productImage: {
    width: "100%",
    height: 300,
  },
  productHeader: {
    padding: 16,
  },
  productName: {
    fontSize: 24,
    fontWeight: "bold",
    marginBottom: 8,
  },
  productPrice: {
    fontSize: 20,
    color: "#FF6B6B",
    fontWeight: "600",
  },
  descriptionWebView: {
    height: 300,
    marginHorizontal: 16,
  },
  addToCartButton: {
    backgroundColor: "#4CAF50",
    padding: 16,
    margin: 16,
    borderRadius: 8,
    alignItems: "center",
  },
  buyNowButton: {
    backgroundColor: "#FF6B6B",
    padding: 16,
    marginHorizontal: 16,
    marginBottom: 16,
    borderRadius: 8,
    alignItems: "center",
  },
  buttonText: {
    color: "#fff",
    fontSize: 16,
    fontWeight: "600",
  },
});

export default HybridProductScreen;
Real-World Example: Amazon
Amazon extensively uses WebViews for product descriptions, promotional content, and deal pages. This allows them to update pricing, add flash sale banners, and modify product information millions of times daily without app updates.
Their hybrid approach keeps performance-critical elements (like the add-to-cart button and navigation) native while embedding dynamic web content for flexibility. During events like Prime Day, they can roll out new promotional layouts instantly across all platforms.
(Reference: Amazon Hybrid Apps)
Method 5: Play Asset Delivery (Android)
For large resources like high-resolution images, 3D models, or video content, bundling everything in your APK creates a massive install size. Play Asset Delivery solves this by letting you package assets separately and download them on-demand.
Understanding Asset Packs
Android App Bundles (.aab) support three delivery modes for asset packs:
- install-time: Downloaded when the app is installed
- fast-follow: Downloaded automatically after app launches
- on-demand: Downloaded only when explicitly requested by the app
Setting Up Asset Packs
1. Create asset pack directory structure:
your-app/
├── app/
└── assetpacks/
    ├── winter_theme/
    │   ├── src/
    │   │   └── main/
    │   │       └── assets/
    │   │           ├── backgrounds/
    │   │           ├── icons/
    │   │           └── sounds/
    │   └── build.gradle
    └── summer_theme/
        ├── src/
        │   └── main/
        │       └── assets/
        └── build.gradle
2. Configure assetpacks/winter_theme/build.gradle:
plugins {
    id 'com.android.asset-pack'
}

assetPack {
    packName = "winter_theme"
    dynamicDelivery {
        deliveryType = "on-demand"
    }
}
3. Update app/build.gradle:
android {
    assetPacks = [":winter_theme", ":summer_theme"]

    defaultConfig {
        // ... other config
    }
}

dependencies {
    implementation 'com.google.android.play:asset-delivery:2.1.0'
    implementation 'com.google.android.play:asset-delivery-ktx:2.1.0'
}
Creating Native Module for Asset Delivery
Create AssetDeliveryModule.java:
package com.yourappname;

import android.content.Context;
import com.facebook.react.bridge.Promise;
import com.facebook.react.bridge.ReactApplicationContext;
import com.facebook.react.bridge.ReactContextBaseJavaModule;
import com.facebook.react.bridge.ReactMethod;
import com.google.android.play.core.assetpacks.AssetPackLocation;
import com.google.android.play.core.assetpacks.AssetPackManager;
import com.google.android.play.core.assetpacks.AssetPackManagerFactory;
import com.google.android.play.core.assetpacks.AssetPackState;
import com.google.android.play.core.assetpacks.AssetPackStateUpdateListener;
import com.google.android.play.core.assetpacks.model.AssetPackStatus;

import java.util.HashMap;
import java.util.Map;

public class AssetDeliveryModule extends ReactContextBaseJavaModule {

    private AssetPackManager assetPackManager;

    AssetDeliveryModule(ReactApplicationContext context) {
        super(context);
        this.assetPackManager = AssetPackManagerFactory.getInstance(context);
    }

    @Override
    public String getName() {
        return "AssetDelivery";
    }

    @ReactMethod
    public void downloadAssetPack(String packName, Promise promise) {
        try {
            assetPackManager.fetch(java.util.Collections.singletonList(packName));

            AssetPackStateUpdateListener listener = new AssetPackStateUpdateListener() {
                @Override
                public void onStateUpdate(AssetPackState state) {
                    if (state.name().equals(packName)) {
                        switch (state.status()) {
                            case AssetPackStatus.COMPLETED:
                                assetPackManager.unregisterListener(this);
                                promise.resolve("Download completed");
                                break;
                            case AssetPackStatus.FAILED:
                                assetPackManager.unregisterListener(this);
                                promise.reject("DOWNLOAD_FAILED", "Asset pack download failed");
                                break;
                            case AssetPackStatus.DOWNLOADING:
                                // You could send progress updates here
                                long downloaded = state.bytesDownloaded();
                                long total = state.totalBytesToDownload();
                                break;
                        }
                    }
                }
            };

            assetPackManager.registerListener(listener);

        } catch (Exception e) {
            promise.reject("DOWNLOAD_ERROR", e.getMessage(), e);
        }
    }

    @ReactMethod
    public void getAssetPackPath(String packName, Promise promise) {
        try {
            AssetPackLocation location = assetPackManager.getPackLocation(packName);

            if (location == null) {
                promise.reject("NOT_INSTALLED", "Asset pack not installed");
                return;
            }

            String assetsPath = location.assetsPath();
            promise.resolve(assetsPath);

        } catch (Exception e) {
            promise.reject("PATH_ERROR", e.getMessage(), e);
        }
    }

    @ReactMethod
    public void getPackStatus(String packName, Promise promise) {
        try {
            assetPackManager.getPackStates(java.util.Collections.singletonList(packName))
                .addOnSuccessListener(states -> {
                    AssetPackState state = states.packStates().get(packName);
                    if (state != null) {
                        Map<String, Object> result = new HashMap<>();
                        result.put("status", getStatusString(state.status()));
                        result.put("bytesDownloaded", state.bytesDownloaded());
                        result.put("totalBytes", state.totalBytesToDownload());
                        promise.resolve(result);
                    } else {
                        promise.reject("NOT_FOUND", "Pack state not found");
                    }
                })
                .addOnFailureListener(e -> {
                    promise.reject("STATUS_ERROR", e.getMessage(), e);
                });
        } catch (Exception e) {
            promise.reject("STATUS_ERROR", e.getMessage(), e);
        }
    }

    private String getStatusString(int status) {
        switch (status) {
            case AssetPackStatus.PENDING: return "PENDING";
            case AssetPackStatus.DOWNLOADING: return "DOWNLOADING";
            case AssetPackStatus.TRANSFERRING: return "TRANSFERRING";
            case AssetPackStatus.COMPLETED: return "COMPLETED";
            case AssetPackStatus.FAILED: return "FAILED";
            case AssetPackStatus.CANCELED: return "CANCELED";
            case AssetPackStatus.WAITING_FOR_WIFI: return "WAITING_FOR_WIFI";
            case AssetPackStatus.NOT_INSTALLED: return "NOT_INSTALLED";
            default: return "UNKNOWN";
        }
    }
}
Using Asset Delivery in React Native
import React, { useState, useEffect } from "react";
import {
  View,
  Text,
  TouchableOpacity,
  Image,
  StyleSheet,
  Alert,
  NativeModules,
} from "react-native";

const { AssetDelivery } = NativeModules;

function ThemeSelector() {
  const [activeTheme, setActiveTheme] = useState<string>("default");
  const [downloading, setDownloading] = useState(false);
  const [progress, setProgress] = useState(0);

  const loadTheme = async (themeName: string) => {
    if (!AssetDelivery) {
      Alert.alert("Error", "Asset delivery not available");
      return;
    }

    try {
      setDownloading(true);

      // Check if pack is already downloaded
      const status = await AssetDelivery.getPackStatus(themeName);

      if (status.status !== "COMPLETED") {
        // Download the pack
        await AssetDelivery.downloadAssetPack(themeName);
      }

      // Get the path to assets
      const assetPath = await AssetDelivery.getAssetPackPath(themeName);

      // Now you can use files from this path
      const backgroundImage = `file://${assetPath}/backgrounds/main.png`;
      const themeConfig = `file://${assetPath}/theme.json`;

      setActiveTheme(themeName);
      Alert.alert("Success", `${themeName} theme loaded!`);
    } catch (error) {
      console.error("Theme loading error:", error);
      Alert.alert("Error", "Failed to load theme");
    } finally {
      setDownloading(false);
    }
  };

  return (
    <View style={styles.container}>
      <Text style={styles.title}>Select Theme</Text>

      <TouchableOpacity
        style={[
          styles.themeButton,
          activeTheme === "winter_theme" && styles.activeTheme,
        ]}
        onPress={() => loadTheme("winter_theme")}
        disabled={downloading}
      >
        <Text style={styles.buttonText}>❄️ Winter Theme</Text>
        {downloading && <Text style={styles.downloadText}>Downloading...</Text>}
      </TouchableOpacity>

      <TouchableOpacity
        style={[
          styles.themeButton,
          activeTheme === "summer_theme" && styles.activeTheme,
        ]}
        onPress={() => loadTheme("summer_theme")}
        disabled={downloading}
      >
        <Text style={styles.buttonText}>☀️ Summer Theme</Text>
      </TouchableOpacity>

      <TouchableOpacity
        style={[
          styles.themeButton,
          activeTheme === "default" && styles.activeTheme,
        ]}
        onPress={() => setActiveTheme("default")}
      >
        <Text style={styles.buttonText}>🏠 Default Theme</Text>
      </TouchableOpacity>
    </View>
  );
}

const styles = StyleSheet.create({
  container: {
    flex: 1,
    padding: 20,
    backgroundColor: "#fff",
  },
  title: {
    fontSize: 24,
    fontWeight: "bold",
    marginBottom: 24,
  },
  themeButton: {
    padding: 16,
    backgroundColor: "#f5f5f5",
    borderRadius: 8,
    marginBottom: 12,
    borderWidth: 2,
    borderColor: "transparent",
  },
  activeTheme: {
    borderColor: "#007AFF",
    backgroundColor: "#e3f2fd",
  },
  buttonText: {
    fontSize: 18,
    fontWeight: "600",
  },
  downloadText: {
    fontSize: 14,
    color: "#666",
    marginTop: 4,
  },
});

export default ThemeSelector;
Real-World Example: Call of Duty Mobile
Call of Duty Mobile uses Play Asset Delivery extensively to manage its massive content library. The initial download is under 2GB, but the game includes over 10GB of assets (maps, weapon skins, character models, seasonal events).
As players progress, the game downloads specific map packs and seasonal content on-demand. During events like Halloween or Christmas, special themed assets are delivered dynamically without requiring a full app update.
(Reference: Google Play Asset Delivery)
Best Practices
1. Implement Robust Caching
One hard lesson I learned: assume the network will fail at the worst possible moment. If your remote config or SDUI fails to load, your app should still show something useful. That’s why I always cache configs locally and treat the server as a “nice to have”, not a hard dependency:
import AsyncStorage from "@react-native-async-storage/async-storage";

const CACHE_KEYS = {
  SCREEN_CONFIG: "@screen_config_",
  REMOTE_CONFIG: "@remote_config",
  LAST_FETCH: "@last_fetch_time",
};

async function fetchWithCache(screenId: string) {
  const cacheKey = `${CACHE_KEYS.SCREEN_CONFIG}${screenId}`;

  try {
    // Try fetching from network
    const response = await fetch(
      `https://api.yourapp.com/screens/${screenId}`,
      { timeout: 5000 } // Add timeout
    );

    if (!response.ok) throw new Error("Network response not ok");

    const data = await response.json();

    // Save to cache
    await AsyncStorage.setItem(cacheKey, JSON.stringify(data));
    await AsyncStorage.setItem(CACHE_KEYS.LAST_FETCH, Date.now().toString());

    return data;
  } catch (error) {
    console.warn("Network fetch failed, using cache:", error);

    // Fallback to cache
    const cachedData = await AsyncStorage.getItem(cacheKey);

    if (cachedData) {
      return JSON.parse(cachedData);
    }

    // No cache available, return default/fallback
    return getDefaultScreenConfig(screenId);
  }
}

function getDefaultScreenConfig(screenId: string) {
  // Return a safe default configuration
  return {
    screen: screenId,
    version: "1.0",
    components: [],
  };
}
2. Validate All Remote Data
Using a schema validation library like Zod helps a lot here. Without validation, one bad config can blank out an entire screen in prod.
import { z } from "zod";

// Define strict schemas
const ComponentSchema = z.object({
  type: z.enum(["hero_banner", "cta_button", "restaurant_grid", "text_block"]),
  imageUrl: z.string().url().optional(),
  text: z.string().optional(),
  backgroundColor: z
    .string()
    .regex(/^#[0-9A-Fa-f]{6}$/)
    .optional(),
  action: z.string().optional(),
  layout: z.enum(["1-column", "2-column", "grid"]).optional(),
});

const ScreenConfigSchema = z.object({
  screen: z.string(),
  version: z.string(),
  components: z.array(ComponentSchema),
  metadata: z
    .object({
      lastUpdated: z.string().optional(),
      author: z.string().optional(),
    })
    .optional(),
});

async function fetchAndValidateConfig(screenId: string) {
  try {
    const response = await fetch(`/api/screens/${screenId}`);
    const rawData = await response.json();

    // Validate the structure
    const validatedData = ScreenConfigSchema.parse(rawData);
    return validatedData;
  } catch (error) {
    if (error instanceof z.ZodError) {
      console.error("Invalid config structure:", error.errors);
      // Log to monitoring service (e.g., Sentry)
    }

    // Return cached or default config
    return getCachedConfig(screenId);
  }
}
3. Gradual Rollouts and A/B Testing
Roll out changes gradually to detect issues early:
// Server-side: Determine user segment
function getUserSegment(userId: string): number {
  // Use consistent hashing to assign users to segments
  const hash = hashString(userId);
  return hash % 100; // Returns 0-99
}

function shouldShowNewUI(userId: string, rolloutPercentage: number): boolean {
  const segment = getUserSegment(userId);
  return segment < rolloutPercentage;
}

// In your API endpoint
app.get("/api/screens/:screenId", (req, res) => {
  const { userId } = req.user;
  const screenId = req.params.screenId;

  // 10% rollout of new home screen
  if (screenId === "home" && shouldShowNewUI(userId, 10)) {
    res.json(newHomeConfig);
  } else {
    res.json(oldHomeConfig);
  }
});

// Client-side: Track which variant user sees
import analytics from "@react-native-firebase/analytics";

useEffect(() => {
  if (config) {
    analytics().logEvent("screen_variant_shown", {
      screen_id: screenId,
      variant_version: config.version,
    });
  }
}, [config]);
4. Performance Optimization
Monitor and optimize remote UI performance:
import perf from "@react-native-firebase/perf";

async function fetchConfigWithPerfTracking(screenId: string) {
  // Start performance trace
  const trace = await perf().startTrace(`fetch_config_${screenId}`);

  try {
    trace.putAttribute("screen_id", screenId);

    const config = await fetchWithCache(screenId);

    trace.putMetric("components_count", config.components.length);
    trace.putAttribute("cache_hit", config.fromCache ? "true" : "false");

    return config;
  } finally {
    await trace.stop();
  }
}
5. Error Boundaries for Dynamic Components
Prevent one broken component from crashing your entire screen:
import React from 'react';
import { View, Text, StyleSheet } from 'react-native';

class ComponentErrorBoundary extends React.Component
  { componentType: string; children: React.ReactNode },
  { hasError: boolean }
> {
  constructor(props: any) {
    super(props);
    this.state = { hasError: false };
  }

  static getDerivedStateFromError(error: any) {
    return { hasError: true };
  }

  componentDidCatch(error: any, errorInfo: any) {
    console.error(
      `Component ${this.props.componentType} crashed:`,
      error,
      errorInfo
    );
    // Log to error tracking service
  }

  render() {
    if (this.state.hasError) {
      return (
        <View style={styles.errorContainer}>
          <Text style={styles.errorText}>
            Unable to load this section
          </Text>
        </View>
      );
    }

    return this.props.children;
  }
}

// Use in your renderer
{config.components.map((componentConfig, index) => {
  const Component = ComponentRegistry[componentConfig.type];

  if (!Component) return null;

  return (
    <ComponentErrorBoundary
      key={index}
      componentType={componentConfig.type}
    >
      <Component {...componentConfig} />
    </ComponentErrorBoundary>
  );
})}

const styles = StyleSheet.create({
  errorContainer: {
    padding: 16,
    backgroundColor: '#fff3cd',
    borderRadius: 8,
    margin: 8,
  },
  errorText: {
    color: '#856404',
    textAlign: 'center',
  },
});
Common Pitfalls to Avoid
1. Over-Engineering: Don't build a full SDUI system if you only need to change button colors. Start with Remote Config and scale up as needed.
2. Ignoring Offline Users: Your app must work without internet. Always have fallback configurations and cached data.
3. Security Vulnerabilities: Never execute arbitrary code from the server. Validate all inputs and use a whitelist approach for component types.
4. Poor Performance: Fetching JSON adds latency. Use aggressive caching, implement progressive loading, and show placeholders during fetch.
5. Breaking Changes: When updating your component schema, maintain backward compatibility or implement versioning
Conclusion
The whole point of all this is simple: ship UI changes faster without breaking your app.
If I had to summarise it as a roadmap:
- Start with Remote Config for flags + simple tweaks
- Add SDUI if you’re constantly changing layouts or running experiments
- Use WebView when content changes a lot and doesn’t need to be fully native
- Use Play Asset Delivery when assets are too heavy for a normal release
You don’t need to build all of this on day one. Pick one pain point (maybe a screen you change often), make it dynamic, and iterate from there.
🚀 Working Demo & GitHub Repository
The full working example for everything covered in this guide is now available.
This demo includes:
- 🧩 Server-Driven UI dynamic screens
- 🔧 Firebase Remote Config setup
- 🌐 WebView-based content rendering
👉 GitHub Repository: https://github.com/azimmemon2002/react-native-dynamic-ui-examples
The repo contains:
- A complete RN project
- SDUI renderer
- Feature flags
- WebView integration
- Setup instructions and running guide
If you want to experiment with dynamic UI techniques or adapt them into your own app, this repo is a great starting point.